
Student how to use the eeMASTERclass wallet, and navigate through your course
This video is specifically for students to show them how to navigate through their wallet and through their course
Watch the video or follow the step by step guide below on how to use your wallet and navigate through your course.
Step by Step: How to use your wallet
Step 1: Login
On www.eemasterclass.co.za, on the top-menu navigation bar, click on YOUR ACCOUNT.
A drop-down list will appear.
Click on the first option, Login/Register.
A page with two columns will open.
The left column is for Login.
The right column is for new registrations.
Login with your username and password as received from your Training Manager.
Step 2: Open your wallet
After you have logged in, you will see a navigation bar on the left-hand side.
To open your Wallet, click on My Wallet. It has already been credited with an amount by your Training Manager.
Step 3: Utilise your wallet
Click on the My Wallet tab on the left in your Dashboard navigation bar to open your Wallet.
You can also click on the wallet icon in the top-menu navigation bar in the top right, to open your wallet.
Now, you will see your Balance.
Your Training Manager has credited your Wallet with an amount for a specific course. You will see the name of the course under Balance. Under Transactions, you can view your purchases made.
You may ignore the following options as part of the wallet, as your Training Manager will utilise these:
Wallet Top-Up.
Wallet Transfer.
Step 4: Purchase your course
In the top menu navigation bar, click on the SHOP tab.
Search for the course that your Training Manager listed in your wallet.
Click on the green Add to Cart button.
Scroll down so that you can see the green Proceed to checkout button.
Click on the green Proceed to checkout button.
A page will open with two columns.
The first column will ask for your billing details.
Please complete all the fields. (You will not be billed for anything.) You must complete the information to receive an invoice in your e-mail inbox. You must send it to your Training Manager.
The second column contains the details of your purchase.
Scroll down to click on the green Place order button.
You will see a message stating: Thank you, your order has been received.
In the top menu navigation bar you will see that your wallet has subtracted the amount of your purchase.
How to navigate through your course
Watch the video or follow the step by step guide below on how to navigate through your course.
Step by Step: How to navigate through your course
Step 1: Open your course
Hover over the CLASSROOM tab. A drop-down menu will open displaying all the courses.
Select the course you have purchased. Any course that you have not purchased will not be accessible by you.
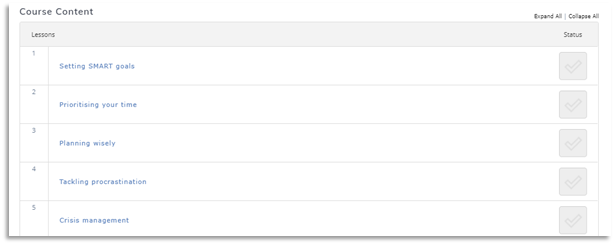
After you have selected your course, you will see the following:
Step 2: Start your course
You will see your course status; in this case, the course has not been started yet.
You will also see the course content. Here, all the lessons of the course are listed in numerical format as in the example in the image above.
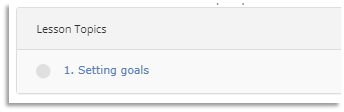
To start with the course, click on Lesson 1: Here, you will see that each lesson discusses several topics:
Step 3: Topic Progress
The buttons on the left-hand side are light-grey of colour. You need to click on the first topic. When you have entered the topic, you will see a topic progress bar.
When you have completed the topic, click on the MARK COMPLETE button to ensure you keep progress of the topics that you have completed.
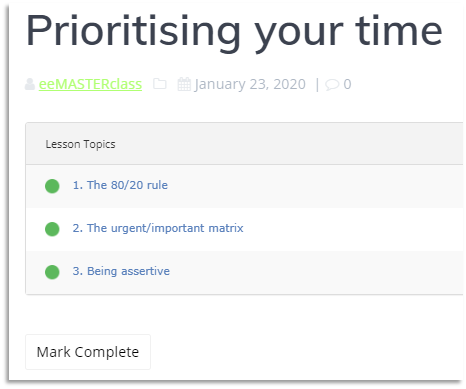
When you click on the MARK COMPLETE button, you will automatically be sent to the next topic and the first topic progress button will have turned green:

Step 4: Complete lessons
Continue with this until you have completed all topics of the lesson.
You will be sent to the lesson with the listed topics and all topic progress buttons will be green. There will be another MARK COMPLETE button. Click the button to indicate you have completed the lesson.
After you have clicked the MARK COMPLETE button for lesson 1, you will be sent to lesson 2 with all its different topics. Now, you need to continue with the process until you have completed all lessons and topics.
Remember, you will not be able to receive your certificate if:
You have not completed all the lessons and topics.
You do not pass with a minimum of an 80% pass rate. (You can do the assessment four (4) times.)
Step 5: Do the assessment
After you have completed all the lessons and topics of each course, visit the EXAM ROOM tab in the navigation bar and select the relevant assessment of the course you are completing.
You should see the following:

Click on the START QUIZ button and ensure you answer each question of the assessment.
When you have finished the assessment click on the FINISH QUIZ button.
You will receive the results of your assessment as well as the option to print your certificate (If you passed with a minimum of an 80% pass rate).
You will also see an average score (of all students that enrolled for the course) as well as your score.
Next, click on the PRINT CERTIFICATE button. Your certificate of completion will appear in a new window.
You can save it to your computer and/or print it out.
Congratulations, you have completed an eeMASTERclass course.
Contact us
Should you need support, you can contact Vicky at vicky@eemaster.co.za or
064 758 4464